.svg)


Why Is My Paint Bubbling?
Paint bubbles (also called blisters) almost always mean the coating lost its grip, usually from moisture, heat, or a surface prep problem. In Palm Springs, we see it a lot after a quick rain followed by a hot afternoon, because trapped moisture turns to vapor and pushes the paint film up. The fix depends on whether the wall is still wet and why it got wet in the first place.
If you pop a bubble and the surface underneath feels damp or looks darker, treat it like a moisture problem first, not a paint problem. Paint is the symptom. The wall is the cause.
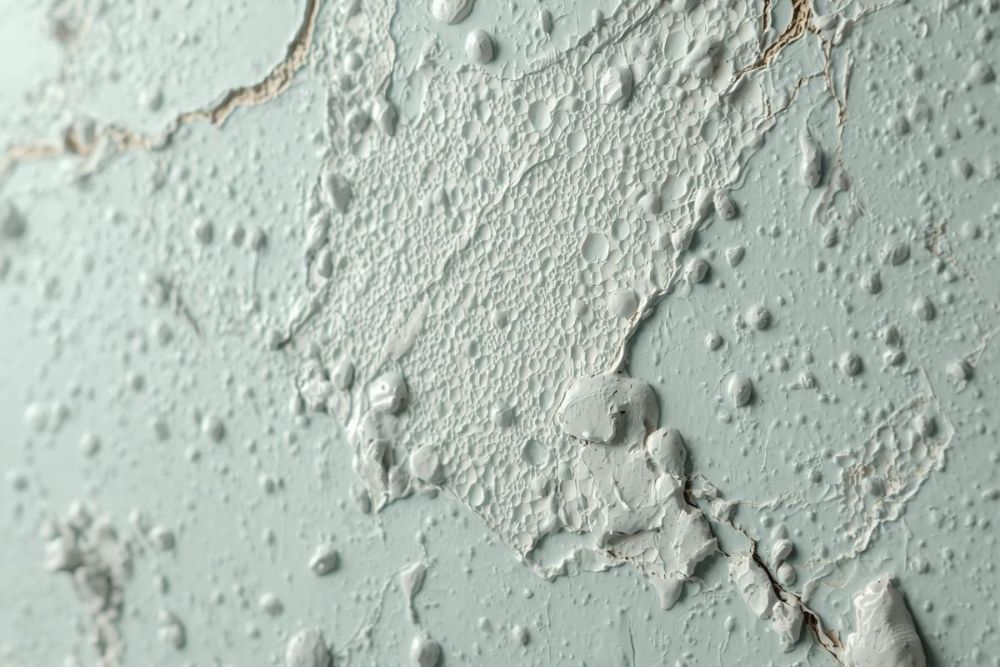
What “bubbling” really is
Paint is a thin plastic-like skin. When that skin is bonded to the wall, it lays flat. When something gets between the paint and the surface, or the paint never bonded correctly, it lifts and forms bubbles. Sometimes those bubbles dry out and become peeling paint. Other times they stay soft and keep growing.
As a house painter in the Coachella Valley, I usually sort bubbling into two buckets: moisture-driven blistering and adhesion failure blistering. The good news is you can often figure out which one it is with a few quick checks.
Fast DIY checks to narrow down the cause
You don’t need fancy tools to get a solid clue. You just need to look in the right spots and be honest about what changed lately (new paint, a leak, weather, sprinkler overspray, or a remodel).
- Touch test: If it feels cool or damp under the bubble, assume moisture is still present.
- Location: Bubbles near baseboards, windows, or ceilings often point to leaks or condensation.
- Timing: Bubbling within days of painting usually points to prep, moisture, or painting in the wrong conditions.
- Pattern: Random bubbles all over can be a coating compatibility issue (primer, old oil paint, or glossy surface).
- Exterior clues: Check sprinklers, roof edges, stucco cracks, and hose bibs for water paths.
We painted an exterior in Rancho Mirage where the only bubbles showed up in one corner. The homeowner swore there was no leak. Turns out a sprinkler head had been rotated and was misting the wall every night at 2:00 a.m. The paint was fine, the watering schedule wasn’t.
Most common reasons paint bubbles on desert homes
Here are the causes we see most on homes in La Quinta, Indio, and the surrounding areas, especially on stucco and drywall:
1) Moisture behind the paint (leaks, sprinklers, or wet stucco)
Water gets into the wall from the outside (sprinklers, stucco cracks, failed caulk) or from the inside (plumbing leaks, roof leaks, HVAC condensation, bathroom moisture). When the sun hits the surface, that moisture warms up and creates pressure. The paint lifts because it’s the weakest “lid” on the system.
2) Painting over a surface that wasn’t clean or dull
Paint needs a clean, slightly rough surface to bite into. If the wall was dusty, chalky, greasy (kitchens), or glossy (old enamel), the new coat can sit on top like tape on dirty glass. Later, heat and normal wall movement break the bond and you see blisters and peeling.
3) Trapped solvent or water from rushing coats
If a coat goes on too thick, or the next coat goes on before the first one can properly dry, moisture can get trapped. In hot weather, the surface can “skin over” fast while the layer underneath stays soft. As the lower layer tries to gas off, you get bubbles.
4) Wrong primer or incompatible coatings
Some surfaces need a bonding primer. Some stains need a stain-blocker. If you paint water-based paint directly over old oil-based paint without scuffing and priming, it can fail. Same idea when painting over patch compound without sealing, the paint can flash, bubble, or peel around repairs.
5) Painting in bad conditions (heat, wind, or unexpected humidity)
Desert weather feels dry, but the “wrong” conditions still happen. Wind can dry the surface too fast, heat can cause rapid skinning, and monsoon humidity can slow curing. Bubbling is more likely when the coating can’t cure evenly.
Table section H2
This table helps you match what you see to the most likely cause, and the first step that usually fixes it. This is meant to be homeowner-friendly, not a lab report.
If you’re still unsure after the table, focus on the “wet or not wet” question. That one decision changes the whole plan. Dry bubbling is usually adhesion and prep. Wet bubbling is usually a water path that needs to be stopped.
When bubbling means you should stop and investigate
Bubbling can be cosmetic, or it can be a warning sign. If you see any of the items below, it’s smart to slow down and treat this like a troubleshooting job, not just a repaint.
- Stains, soft drywall, or a musty smell near the bubbling
- Bubbling that returns a few weeks after repainting
- Cracking stucco that lines up with the bubbling area
- Baseboard swelling or flooring edges lifting nearby
In older homes in Palm Desert, bubbling near ceilings sometimes ties back to roof flashing, swamp cooler lines, or an AC condensate drain that’s not doing its job. It’s not always obvious, and paint can hide the trail until it fails again.
How a licensed pro typically diagnoses bubbling paint on-site
We don’t guess. We narrow it down with a simple inspection flow. We look for water paths, test how well the paint is bonded, and check whether the surface underneath is stable.
- Map the pattern: one wall, one corner, or everywhere.
- Check moisture sources: sprinklers, hose bibs, roof edges, bathrooms, laundry, AC drains.
- Test adhesion: a careful scrape and tape pull on a small area to see what releases.
- Check surface condition: chalky residue on stucco, glossy old paint, dust, grease.
- Decide repair depth: spot repair, section repaint, or full wall repaint.
Paint bubbles because the coating isn’t bonded. The top two reasons are moisture behind the paint and poor surface prep. Fix the water source or prep issue first, then scrape to stable paint, prime correctly, and repaint with proper dry time.
Interior bubbling vs exterior bubbling (what changes)
The core causes are similar, but the most common triggers are different.
Interior walls
Interior bubbling usually points to bathroom moisture, a plumbing leak, or paint applied over dust, grease, or patch compound. Kitchens are big offenders because cooking oils can leave a thin film you barely see. If you’ve got bubbling near a sink, don’t ignore a slow leak. That becomes cabinet and drywall damage fast.
Exterior walls
Exterior bubbling often ties to sprinklers, stucco cracks, failing caulk, or painting on a hot wall. In Indio, I see south and west facing walls blister more because they get hammered by afternoon sun. That heat makes any trapped moisture more aggressive, and it stresses coatings that were applied too heavy.
Repair vs repaint, what’s usually worth it
Homeowners ask this a lot: should I just spot-fix, or do I repaint the whole wall? Here’s the honest rule we use in the field.
If bubbling is limited to a small area and the rest of the paint is solid, a spot repair can work well. If bubbling is widespread, or if the paint is already peeling in multiple zones, you’ll usually spend less in the long run by doing a full wall repaint with the right primer and prep. Spot fixes on a bad foundation often come back, and that’s where costs creep up.
What impacts cost the most (without turning this into a sales pitch)
Paint bubbling repair cost varies, but the big cost drivers are predictable:
- Is there a moisture source? Fixing a leak can cost more than the paint work, but it’s non-negotiable.
- How much prep is needed? Scraping, sanding, deglossing, and priming is where time adds up.
- Surface type: Stucco, wood, and metal each need different prep and primers.
- Access: Two-story walls, tight side yards, and high gables add labor and safety steps.
- Color and sheen match: Touch-ups are harder with deep colors and eggshell or satin finishes.
Related systems that often overlap with bubbling paint: plumbing leak repair, roofing leak repair, drywall patching, stucco crack repair, and HVAC drain line service.
Interactive widget section H2
Use this quick tool to get a likely cause and the next best step. It’s not a replacement for an on-site inspection, but it’s a solid starting point.
If the widget points to moisture and you’re not sure where it’s coming from, don’t guess. A small roof edge leak, a pinhole plumbing leak, or an AC drain issue can all show up as “paint problems” first. Fixing the source is what makes the repaint last.
Step-by-step: how bubbling paint is usually repaired correctly
If you want a repair that lasts, the sequence matters. Skipping steps is how bubbling comes back.
- Stop the cause: Fix leaks, adjust sprinklers, repair cracks, re-caulk openings.
- Dry time: Let the area dry fully. On stucco, that can take longer than people expect.
- Remove failed paint: Scrape to stable edges, then feather sand.
- Clean and prep: Dust off, degloss if needed, and remove chalky residue on exteriors.
- Prime properly: Use bonding primer where adhesion is the issue, or stain-blocker where staining is present.
- Repaint with correct conditions: Thin coats, proper dry time, avoid painting a hot wall.
Common homeowner mistakes that cause repeat bubbling
These are the repeat offenders I see when we get called back after a DIY repair.
- Painting before the wall is dry because the surface “looks fine”
- Skipping primer on glossy paint, patched areas, or chalky stucco
- Using cheap caulk that fails fast around windows and trim
- Spot painting without feathering, which leaves ridges that fail again
- Ignoring water sources like sprinklers, hose drips, and AC drains
Do you need a permit for paint repairs?
For most standard interior and exterior painting, permits are not required. Where it can change is when bubbling is caused by repairs that do need permits, like major stucco restoration, structural repairs, or certain exterior work in HOA-controlled communities. In some neighborhoods in Rancho Mirage and Palm Desert, HOA rules can also restrict colors and sheen levels, even if the city doesn’t require a permit.
When you should call a pro instead of chasing it yourself
DIY is fine for small, dry areas. But if any of these are true, professional troubleshooting is usually cheaper than repeating the same repair.
- Bubbling is spreading or shows up in multiple rooms
- You suspect a leak but can’t locate it
- Stucco is cracked and water may be getting behind it
- The wall is high and access requires ladders or staging
- You’ve repainted once and it bubbled again
Truly Tough Painting contact
If you want a quick opinion, photos help a lot. A wide shot for location, then a close-up of the bubble, plus a photo of nearby sprinklers, windows, or ceiling lines.
Frequently Asked Questions
Is paint bubbling the same thing as peeling?
Bubbling is usually the step before peeling. The paint film lifts first, then it eventually cracks and releases. If you fix the cause early, you can often prevent a larger peel-off.
Can I just pop the bubbles and paint over them?
You can, but it usually comes back. If the paint lifted because of moisture or poor adhesion, painting over it is like putting a sticker on dusty glass. Scrape to stable paint, prep, and prime first.
Why does bubbling show up after it rains if we live in the desert?
Desert rain is often followed by strong sun and heat. Moisture that got into stucco cracks or around windows warms up and creates vapor pressure. That pressure can push paint loose, especially on south and west facing walls.
Does painting in high heat cause bubbles?
Yes, it can. Hot surfaces can make the top of the paint dry too fast while the layer underneath stays soft. Trapped moisture or solvents can then form blisters. Painting early in the day and using correct dry times helps.
What primer should I use to stop bubbling from coming back?
It depends on the cause. For glossy or hard-to-stick surfaces, a bonding primer is often the right move. If there’s staining from water or tannins, a stain-blocking primer is better. The key is scraping to stable paint and prepping the surface first.
When is bubbling a sign of a leak?
If the area under the bubble is damp, cool, stained, or smells musty, treat it like a leak until proven otherwise. Bubbling near bathrooms, kitchens, ceilings, and windows is especially suspicious. Fixing the water source is the priority.


